The Yamaha Reface 'Rhodes' project
I absolutely love the sound modeling inside the Yamaha Reface CP, in my opinion it's about as close as hardware has attained to the Rhodes character (in it's price point). The downside of the CP is the speakers are small and hollow sounding, the keys are tiny, and the plastic portable housing just lacks appeal. This is what led me to do a full teardown and rebuild with the 'guts' of the CP and have fun fixing each of those flaws...


01
The sound engine
The project requires a complete teardown of the Reface CP. Fortunately this is not particularly difficult, requiring a few different sized Phillips head screwdrivers, some simple pry & precision tools, and keeping all extracted parts organized.


02
New Keybed
I wanted full-size keys for my keybed, but due to space limitations I wasn't looking for a full 88-key span. Fortunately there are a few options on the 61 key market, the one I chose was the M-Audio Keystation 61 as it didn't have tons of unnecessary controls (like channel faders or drum pads) and was reasonably affordable, I purchased mine used. This controller also had the benefit of a MIDI-out port, giving me direct control from the M-audio bed to the circuits of the CP boards via one cable into the Yamaha MIDI splitter.


03
Weighting MIDI controller keys
I was unhappy with the feel of the M-audio controller's keybed, but I found an interesting way to manipulate the feel of the keys was to add weights to the underside of the keys. This does not reproduce the hammer-action feel, rather it makes the key feel a bit more substantial in its resistance and bounceback. Wheel-weights were a great option here, as they come with an adhesive back and reasonable control over how much weight I wanted on each key.
04
A new enclosure
With the new keybed I now have a known width to design my enclosure around. For the main interior structure I'm building a frame out of MDF as it's a solid & dense material which also provides a little bit of bass trap benefit in the studio. Ultimately the MDF will not be visible, this is just a boxy structure which I will continue to design and build around.
I left extra room to the Left and Right of the keybed for the amp and modulation controls, and routed in cable ports at multiple locations as I'm not sure yet where I may need to thread audio and power lines.


05
Framing the keybed
It's crucial that the keybed be mounted appropriately in the enclosure. I attached the keys assembly to an additional piece of plywood where I can thread screws in from beneath the plywood panel, up into the plastic pillars of the keybed. This is similar to how the keybed was installed in the M-audio housing only instead of going through the plastic exterior housing it's now mounted to a more solid plywood surface.
06
Defining the look
What I was most excited about was finally digging into my wood stash and letting the materials themselves help shape the piano’s overall look.
I save offcuts from all custom Munstre projects, and I had a backlog of really nice Peruvian Walnut & some figured Black Walnut... all of which were a little too small to use in any larger builds (like a table etc...). For this project they were a perfect size as I could re-saw the boards at the bandsaw, yielding some "bookmatched" pieces as well as doubling the available material. 1" thick boards could be sawn down to just under 0.5" (minus the kerf of the blade) which was still plenty thick to conceal the MDF enclosure. I then further cut some of those small boards into thin veneer (around 1/16" thick) to cover some of the more intricate areas next to the lowest & highest key.


07
Mod-wheel makeover
The modulation/pitch wheels on the M-audio were not going to look quite right on a vintage inspired instrument. Honestly they were not necessary to keep at all, as a vintage Rhodes piano would not have them, but I thought it might be an interesting way to alter the sound so I did.
I challenged myself and decided to try making them out of brass. I used brass threaded rod, and a larger solid brass rod and drilled out a hole at the drill press. In hindsight it would've been better to chuck-up the brass rod into the drill press and then push it into a drill bit as that would've found center easier. A lathe would've also been a good option, but I still don't have one at the Munstre workshop!

08
The control panel
The most complicated routing of the entire project (aside from the detailed backer panel shown later) was the main control panel. To retrofit the circuit board I needed the right balance between thin material so the controls were not sitting back too deep in the panel, and thick enough that the entire length of the front strip would have strength and not bow or feel flimsy. For as simple as the front looks, it involved multiple 45 degree cuts to set the overall angle, and 3 different stages of depth to the rear pocket where the circuit board would install and be secured.
I was able to accomplish a great fit with these strong neodymium magnets allowing the panel to easily pop in/out of place when i needed to access and adjust anything, without fear of wearing out any screw threads over time.


09
New amp & speakers
As mentioned earlier, the onboard speakers of the Reface CP had to go. I ran some frequency tests of each note in the sound modeling of the CP board to get an accurate range (basically 100hz up to 15k, though technically I think 50hz is the start of the formant at the low end). I found these 8ohm speakers by Eminence that covered that range perfectly and were reasonably priced. I soldered the speaker wire to the speakers so they wouldn't be knocked loose, the other end of the wire's leads attach easily to the back of the amp...
With the speakers selected, I wanted a strong, concealed amp that was not going to color the sound any further, and something with basic & attractive controls that would be easy to incorporate to the enclosure. After some digging I settled on the Fosi TB10d, it has plenty of power, a great form factor (which also happened to equal the size of the modulation/pitch/octave control box on the other side of the keyboard), and some very basic Black controls for the Bass, Treble, and Volume. The Black coloring pairs easily with Walnut, and the little White notch makes the positioning easy to see.
10
Placing the circuit boards & & rear paneling
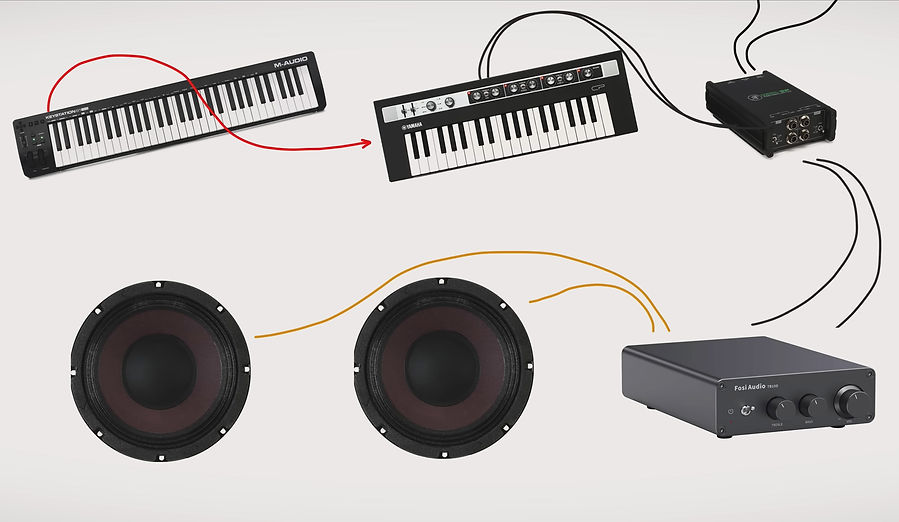
Mounting the circuit boards was not too difficult, but there is one limitation set by the ribbon cable length between 2 of the boards (only about 2.5"). So those boards need to mount close to one another. I ended up mounting the I/O board flat on one level of the enclosure, with the MIDI board mounted on the wall next to the I/O.
The next bit was isolating the speakers from the line outputs of the board. The easiest way to cleanly split the signal is to use a DI box. I didn't need anything fancy for this, but still wanted a reliable option, so the Mackie passive stereo box seemed to be the best choice. This splits the signal for a clean line-out that I can run into my DAW, or outboard gear, while also being able to independently hear the speakers (or turn them off) without affecting the true signal. Conversely, I can record just the speakers so it gives a live sound, colored by the actual sound of this enclosure.
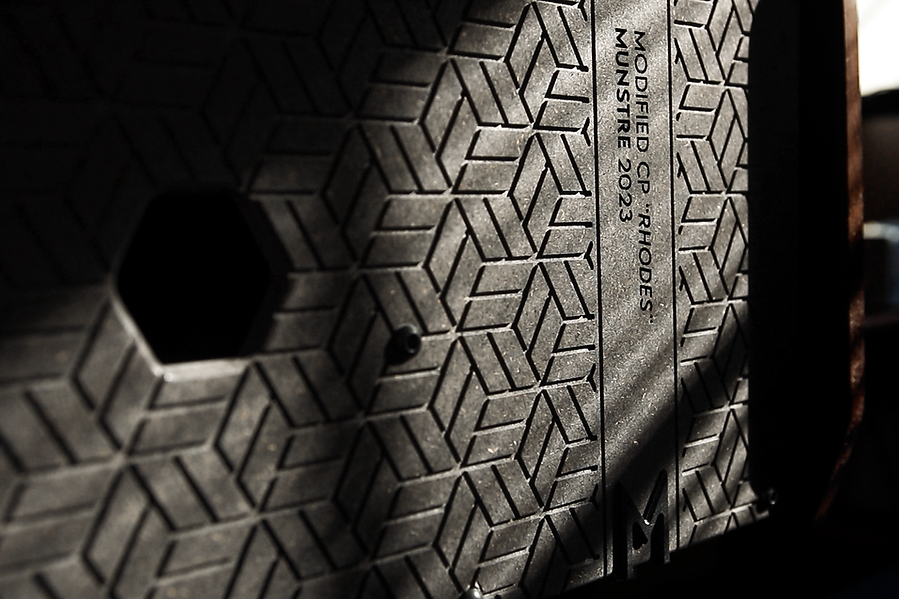
The rear panel has some involved carving in it, and while it's primarily decorative I also used the pattern to conceal the bolt locations where the panel will attach. These bolts fasten into threaded metal inserts which are installed in the MDF enclosure. I also cut out positioning for all of the I/O ports (line outs, headphones, sustain etc...) as well as sound pressure holes directly inline with the isolated speaker box sections of the enclosure.


A look at the internal signal flow:


11
Aesthetic details
There were many choices along the way that would define the look of this instrument. Generally speaking from a design perspective you don't want to go far beyond 3 primary tones in a piece - but you can get away with more coloring if you have some neutral tones in your palette.
With the keys and the amp controls being simply Black & White they will pair with nearly anything, making the Walnut wood the overall warm coloring and feel of the instrument as a whole. The 2 additional pops of color come from the brass knob accents, and a strip of Olive Green felt positioned at the keys where they are framed in by a strip of brass tying each color and texture of the instrument together in one band.


12
Powering & completing the build
There are 3 individual units that require power in this build, the MIDI controller, the amp, and of course the boards of the CP. I wanted all of these to power on simultaneously with one switch, and I personally like the warm amber rocker switches found in old electronics and guitar amps...
I am not an electronics engineer, so I don't want to go deep into the schematics here, but I basically rewired a small power strip where the switch wiring is extended out to this new rocker switch and mounted next to the main control panel. That switch turns the entire strip on/off and thus anything plugged in will be controlled by that signal. Luckily all units including the CP board can remain in an 'Always ON' state, so they will come back on as soon as power is provided, without needing to individually power each item one at a time with individual switches.
I have a very detailed build video for this project which is also linked at the end of the page. I learned a lot from this build, and it will likely be one of my favorite projects in my career as it's such a pleasant instrument to play in the studio, and was just an enjoyable use of the tools and materials in the Munstre workshop. As Munstre continues to grow, providing the best studio desks, eurorack workstations, sidecars, and other recording studio racks on the market. We use projects like this 'Rhodes Reface CP' as inspiration for future products in our lineup.